Connect your EmailBison API key
When to use this guide: Use this guide when configuring or validating engagement platform integration behavior.
Here are step-by-step instructions on how to connect EmailBison to OutboundSync via API key. The key powers block list sync, category-based filters, and — unique to EmailBison — enriching tag events before they sync (see What the API key does).
What the API key does
Section titled “What the API key does”EmailBison runs on a dedicated instance, so OutboundSync connects with both your API key and your instance Base URL. Together they power:
- Block list sync and category-based filters — the same as other engagement platforms.
- Tag event enrichment — unique to EmailBison. A Tag attached or Tag removed webhook identifies the lead by ID but does not include the contact’s email, so OutboundSync uses your API key to look the contact up in EmailBison and resolve the email before writing the activity to your CRM. Only tags on leads are supported.
Because of that lookup, an invalid or missing API key breaks tag activity sync — unlike sends, opens, replies, and bounces, which arrive complete in the webhook and sync without the key. If Tags attached or Tags removed stop reaching your CRM, check the API key first.
If EmailBison regenerates the key, copy the current key and edit the existing OutboundSync entry rather than creating a duplicate.
Step 1. Generate an API key in EmailBison
Section titled “Step 1. Generate an API key in EmailBison”First, log in to EmailBison and go to your EmailBison Settings.
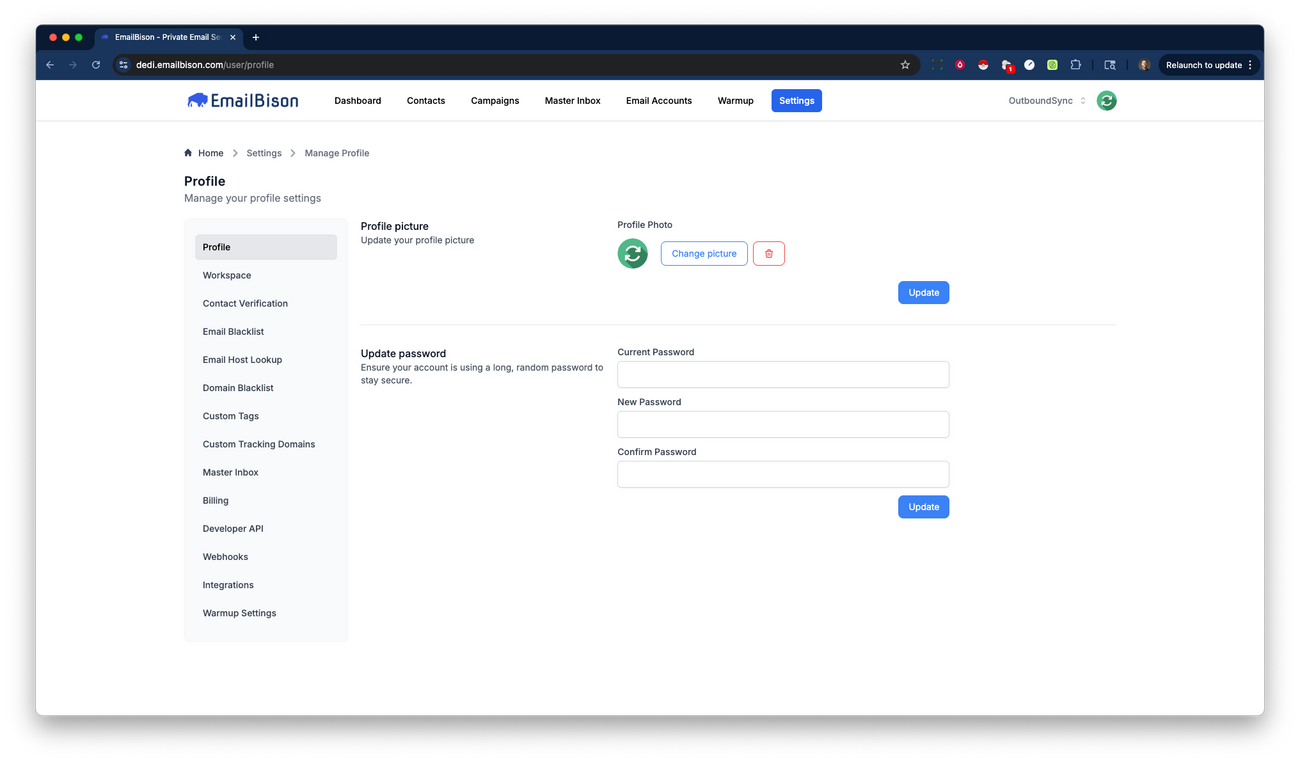
Then, in the left menu, click Developer API, followed by the New API Token button.
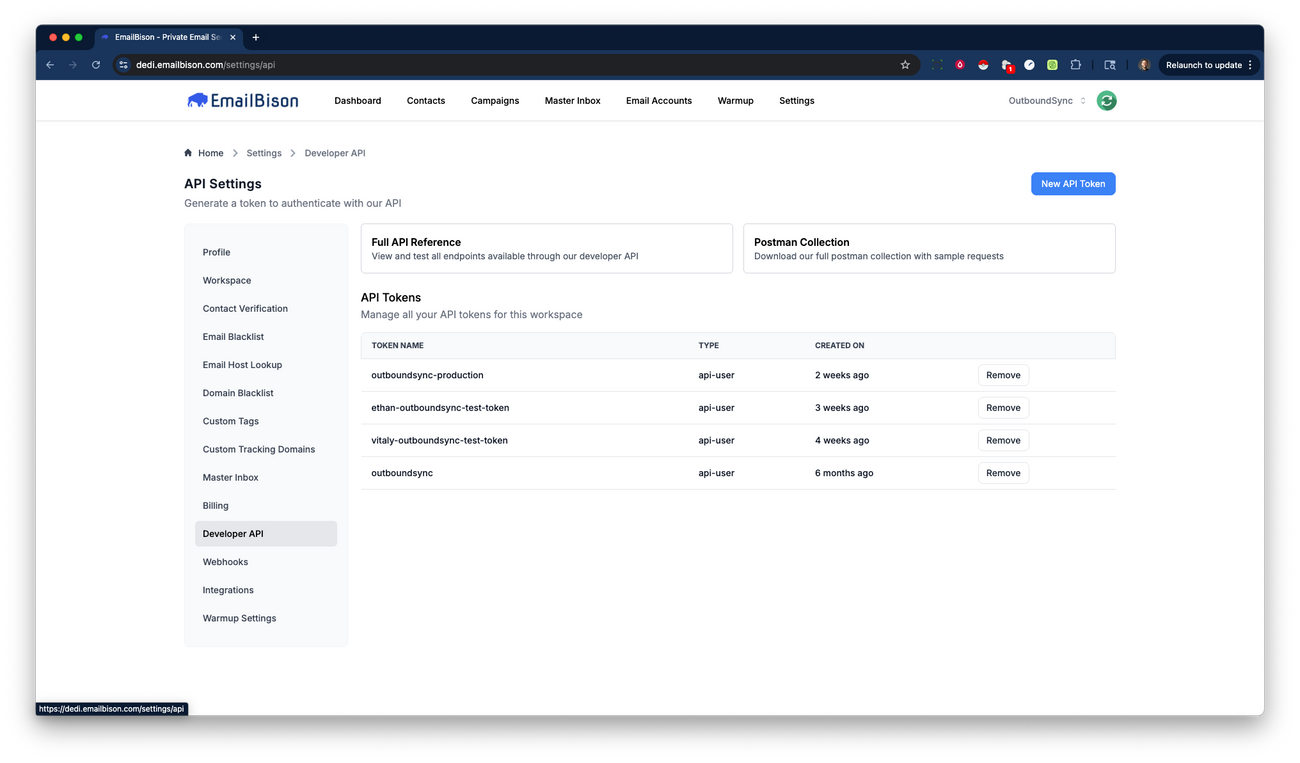
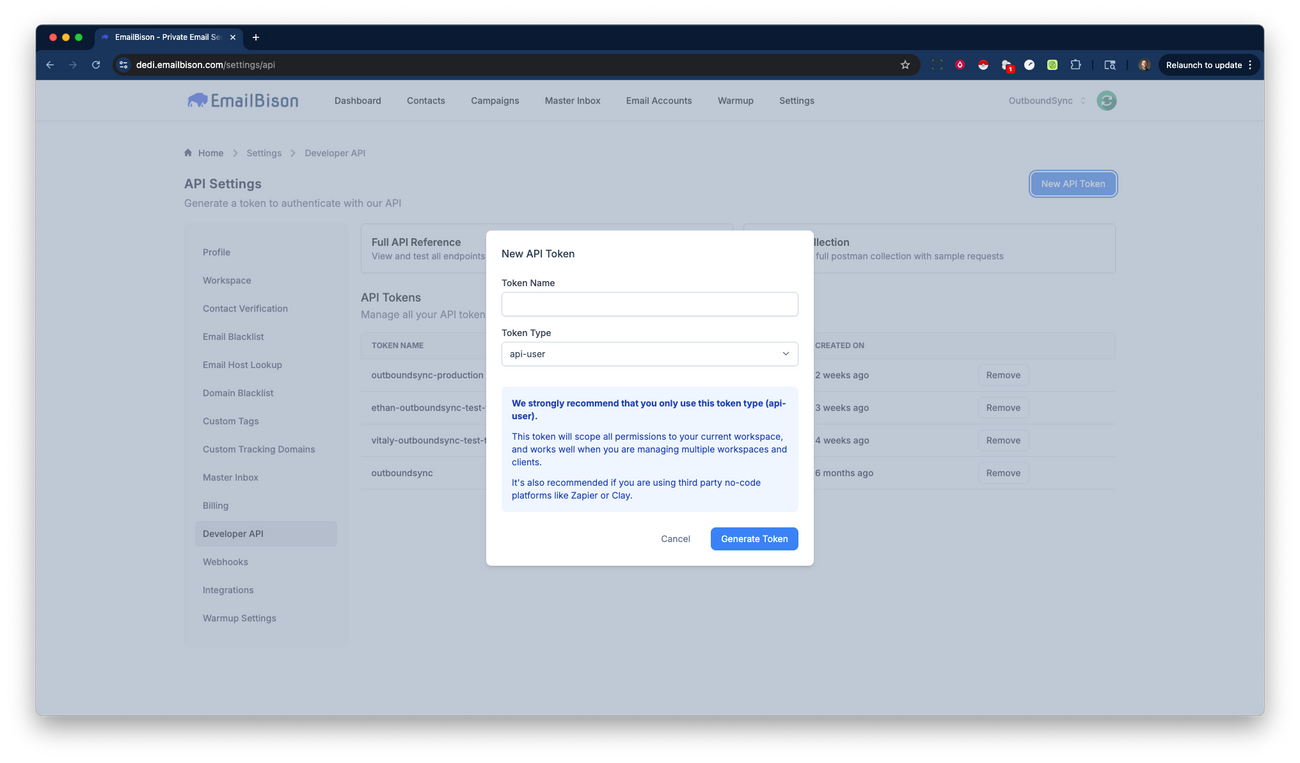
Enter your Token Name, select which Token Type you want to use, then click Generate Token.
Finally, copy your API Token.
Step 2. Add your API key in OutboundSync.
Section titled “Step 2. Add your API key in OutboundSync.”Next, login to OutboundSync and click the Connected Accounts in the left menu.
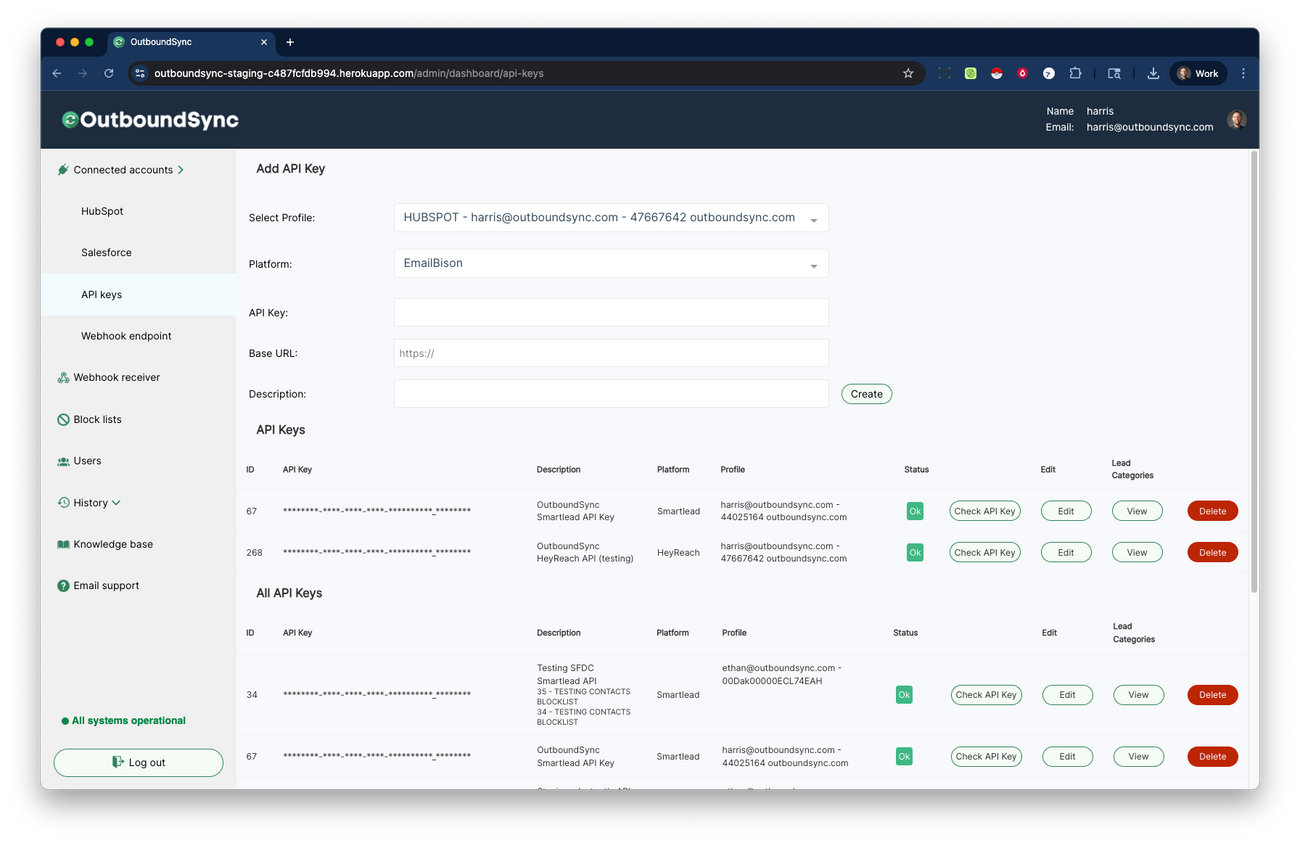
- Navigate to External API keys (screenshots may still show the previous API keys or Tool credentials label for this page).
- Select which Profile (CRM account) you want to use.
- Select EmailBison under the Tool dropdown.
- Enter/paste your API Key.
- Enter the Base URL for your dedicated EmailBison instance.
- Enter a Description.
- Click the Create button.
OutboundSync will check your API key before saving it. If your API key fails, it will not be saved in OutboundSync.
Step 3. Maintaining your API connection
Section titled “Step 3. Maintaining your API connection”You can always come back to OutboundSync and click the Check API Key button to verify that your API Key is still valid and active.
In this page, you can also check your Lead Categories or Statuses. You can learn more about what this means here .