How to install pre-built Supered packages
When to use this guide: Use this guide when you are onboarding OutboundSync or validating initial setup.
OutboundSync has created pre-built, native HubSpot Lists, Workflows, and Dashboards filled with reports. They are packaged via Supered for OutboundSync users to install in their own HubSpot portals.
These packages are HubSpot only. Salesforce customers build reports from synced Tasks and custom fields — see Reporting on outbound activity in Salesforce.
These packages enable better lead and deal attribution, campaign performance tracking, and overall reporting based on historical OutboundSync data. Our team has spent years building and improving these with users. They will save you hours once you install them.
There are two versions of these packages: One that includes HubSpot’s default properties and lifecycle stages, and one that uses only OutboundSync’s custom properties and lifecycle stages. Make sure you’re choosing the right one when installing them.
HubSpot plan: OutboundSync does not require a specific HubSpot tier to install Supered packages. HubSpot does gate some of the features these packages use — especially workflows, custom reports, and dashboards — so check the HubSpot tier guide for which plan unlocks the lists, automation, and reporting you want to run.
About Supered
Section titled “About Supered”Why use Supered? They created a novel way for us to build these packages of HubSpot native lists, workflows, and reports/dashboard for you. Currently, there is no other way to do this—no other app or even HubSpot API can do what Supered does.
Do I have to pay for it? No, OutboundSync is a customer of Supered. We pay for their tool to help you make the most of our data in your HubSpot portal. We do not charge you to use Supered packages and you do not need to a paid Supered plan.
Choose your package type
Section titled “Choose your package type”OutboundSync ships Supered packages in three types. Pick the one that matches how you sync activity into HubSpot. Support sends the install link(s) for that type — sometimes labeled email activity, social activity, or omnichannel.
Omnichannel
Section titled “Omnichannel”Install the omnichannel package when you sync both email SEPs and social SEPs (for example, Smartlead or Instantly plus HeyReach or Aimfox). One package covers lists, workflows, and reporting across email and social timeline events so you do not install separate email and social packages.
Install the email package when you sync email SEPs only. Lists, workflows, and dashboards are built around OutboundSync email timeline events (sends, replies, opens, lead categories, and related engagement).
Social
Section titled “Social”Install the social package when you sync social SEPs only (for example, HeyReach or Aimfox). Lists, workflows, and reporting are built around OutboundSync social timeline events (messages, connection requests, tags, and related engagement).
If you started with email and later add a social SEP, install the social package as well — or ask support for the omnichannel package if you prefer a single combined install path for new portals.
What’s inside each package
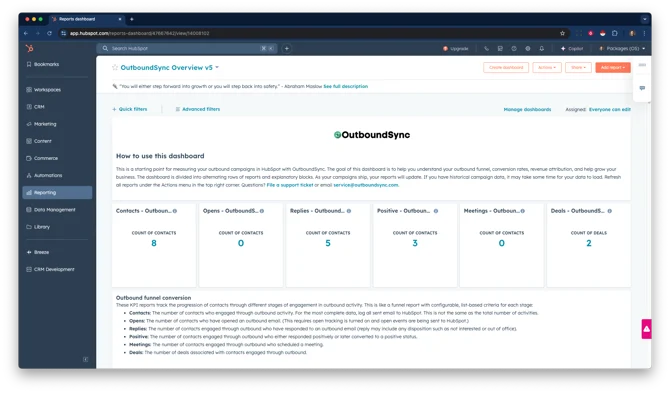
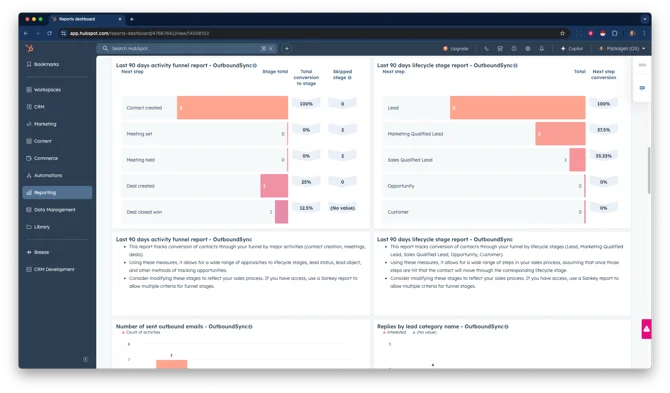
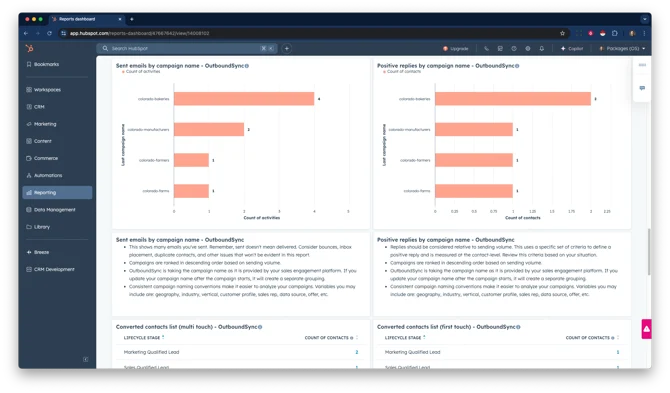
Section titled “What’s inside each package”Every package type — omnichannel, email, or social — includes the same kinds of HubSpot resources. The screenshots below show the email-flavored examples; social and omnichannel packages follow the same Lists / Workflows / Dashboard & Reports shape, scoped to that channel set.
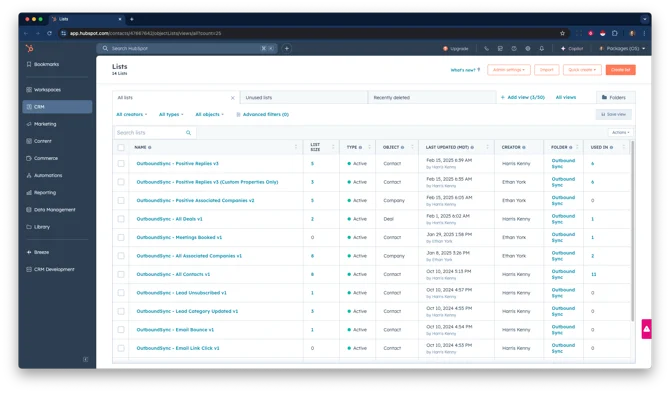
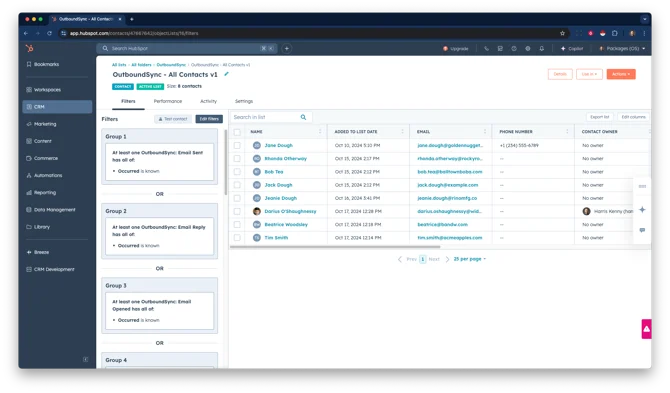
Pre-configured lists that filter data using OutboundSync’s custom properties. These cover contact engagement, deal tracking, company associations, and lead categorization for the channels in your package.
Workflows
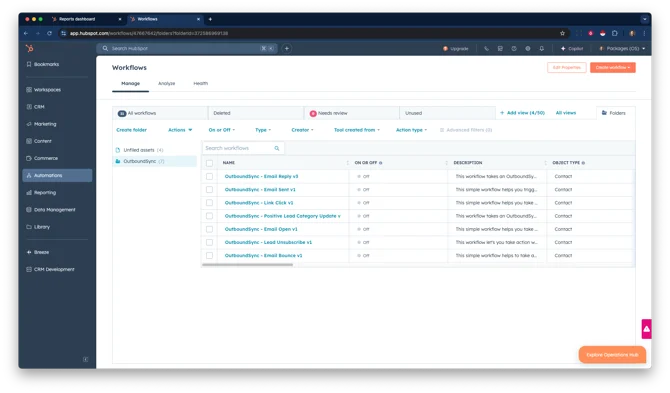
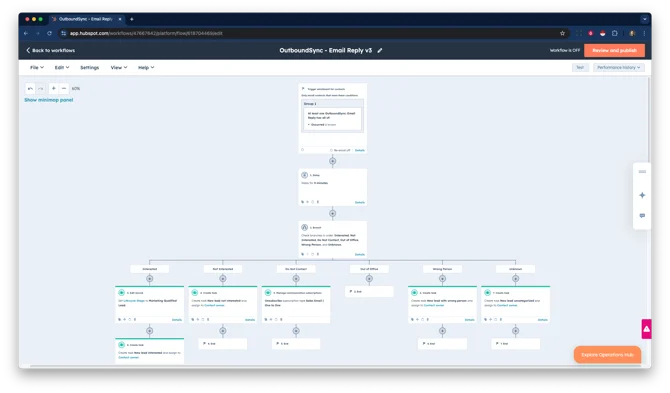
Section titled “Workflows”Customizable templates for RevOps and sales cycles. A key workflow triggers when a contact replies, branching by sentiment using Lead Categories. Workflows also automate actions based on lead status, interactions, and behaviors using OutboundSync timeline events as triggers. After install, choose one enrollment trigger for reply routing — see Choose one enrollment trigger.
Dashboard & Reports
Section titled “Dashboard & Reports”A ready-to-use dashboard with insights into volume, replies, deal attribution, and converted leads for the channels in your package. Reports break down interaction data, including performance by campaign where available. Users can customize these reports to fit their HubSpot settings and needs.
This package adds roughly 20 custom reports to your HubSpot portal. If your portal is near HubSpot’s custom report limit, the install may fail — see HubSpot custom report limit blocks dashboard install below.
Installing Supered packages
Section titled “Installing Supered packages”To install the Supered packages in your HubSpot portal, follow these steps:
- Package Links – Your support team at OutboundSync will provide the install link(s) for your package type (omnichannel, email, or social). Some installs are a single Supered link; others arrive as separate Lists, Workflows, and Dashboard links for that type — follow whatever support sent.
- Login to Supered – Clicking a link will take you to Supered’s site, where you will be prompted to log in using your email or HubSpot account.
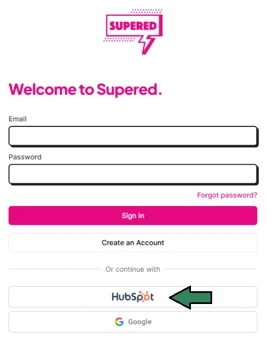
- Join or Create a Team – If this is your first time using Supered, or if you are an agency installing for a client without prior installations, create a new team (ideally named after your company or client). Otherwise, join an existing team.
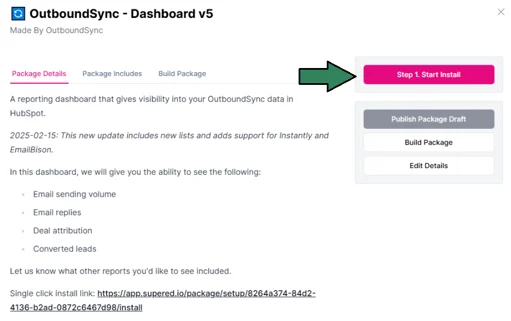
- Set Up Sidekick – When you get to Start Install, it will prompt you to install the Supered Chrome extension, Sidekick, which delivers the packages to your HubSpot portal.
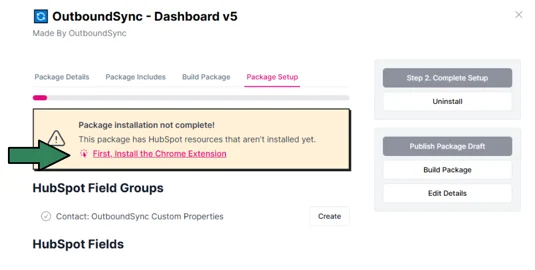
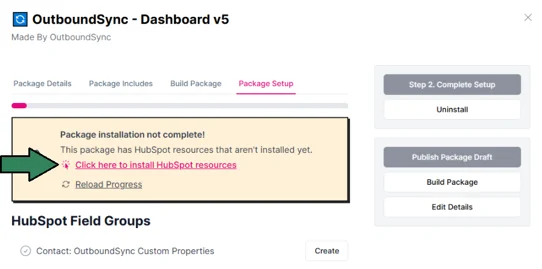
- Initiate Installation – Click the pink installation link to Install HubSpot Resources. This will open a tab in your HubSpot portal with the Sidekick extension.
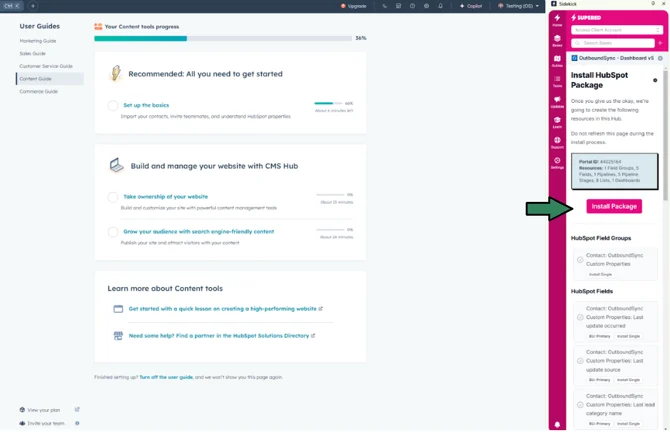
- Confirm Installation in HubSpot – Click Install Package within the Sidekick extension. The system will go through all fields and resources in the package.
- Verify Installation – Once your installation is complete, you can find the packaged items within your CRM, ready for you to explore and configure for optimal use.
- Repeat if needed – If support sent more than one link for your package type (for example, separate Lists, Workflows, and Dashboard installs), repeat these steps for each link so every component lands in HubSpot.
Troubleshooting
Section titled “Troubleshooting”Sidekick shows a detailed error on the affected resource when an install step fails. Two issues can come up during install — try the steps below before contacting support.
HubSpot custom report limit blocks dashboard install
Section titled “HubSpot custom report limit blocks dashboard install”Symptom: Sidekick shows an error like Portal has exceeded object creation or reports that your portal has maxed out custom reports — usually when installing the Dashboard & Reports resources.
Cause: HubSpot caps how many custom reports a portal can create, and the cap depends on your HubSpot subscription. This is a HubSpot limit, not an OutboundSync or Supered issue. The OutboundSync dashboard package adds roughly 20 custom reports, so your portal needs about that many free report slots.
Fix:
-
Free up report slots first. In HubSpot, go to Reporting → Reports and archive or delete unused custom reports to make room. Deleting a dashboard on its own does not free slots — its reports stay in your reports list unless you delete them there. (HubSpot: Manage reports in your reports list.)
-
Then finish the dashboard install. You do not need to reinstall the Workflows resources. Use one of the paths below.
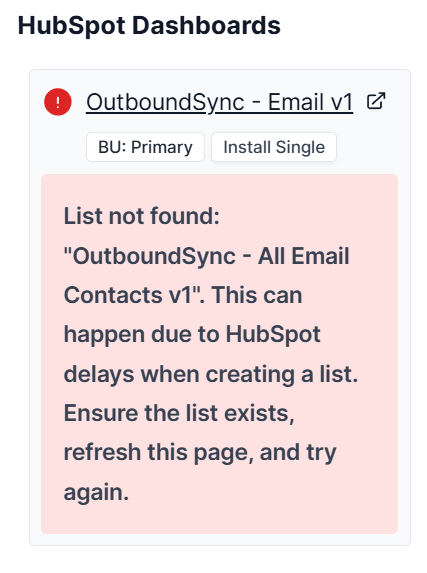
Install single (when Lists are already installed). If only the final dashboard resource is left in Sidekick, scroll to the bottom of the resource list and use Install single on it. This works when the Lists dependencies (such as
OutboundSync - All Email Contacts v1) are already in HubSpot. If those lists are missing, Sidekick shows a List not found error instead — install the Lists resources first, then retry Install single.
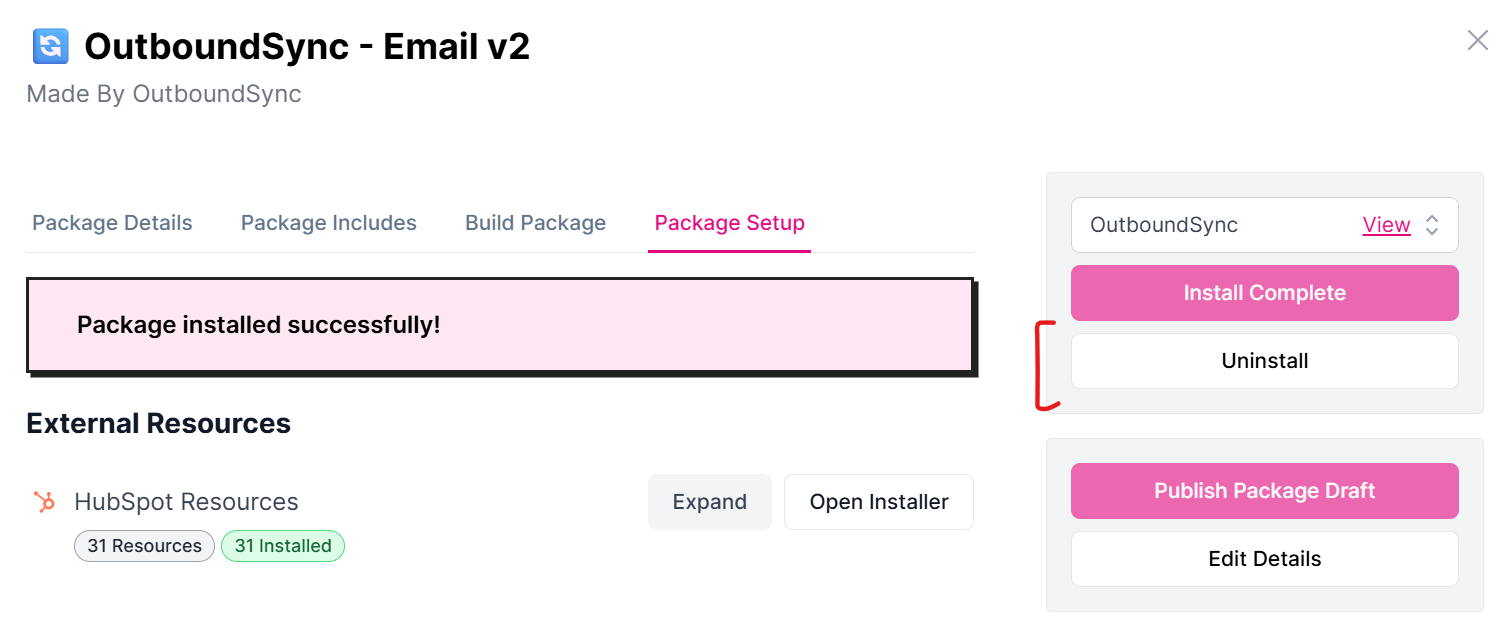
Or re-run the full Dashboard package. In Supered, open the package’s Package Setup tab and click Uninstall. This does not delete anything in HubSpot. Then run Install again. Supered will not duplicate resources that already exist — only missing or new lists, reports, and other resources are created.
- Confirm it worked. In HubSpot, open Reporting → Dashboards and verify the OutboundSync dashboard and its reports are present.
Sidekick panel did not appear in HubSpot
Section titled “Sidekick panel did not appear in HubSpot”Symptom: Open Installer opens HubSpot, but the Sidekick install panel does not appear on the right.
Fix: Close the HubSpot tab, return to the Supered install page, and click Open Installer again. Select the correct HubSpot portal if prompted. The panel usually loads on the second attempt.
If these steps do not resolve the issue, locate the affected resource in the Sidekick panel for the error details, then contact OutboundSync support.
Next step
Section titled “Next step”- Updating block and exclusion lists — wire CRM-driven block lists after Supered install
- Routing replies with a workflow — customize reply routing enrollment
- Run a webhook test payload